Solar Tracker Wi-Fi Remote Control
About Remote Control
At the customer's request, a remote control system via Wi-Fi can be installed in the solar tracker controller via a WEB browser on a PC or mobile phone.
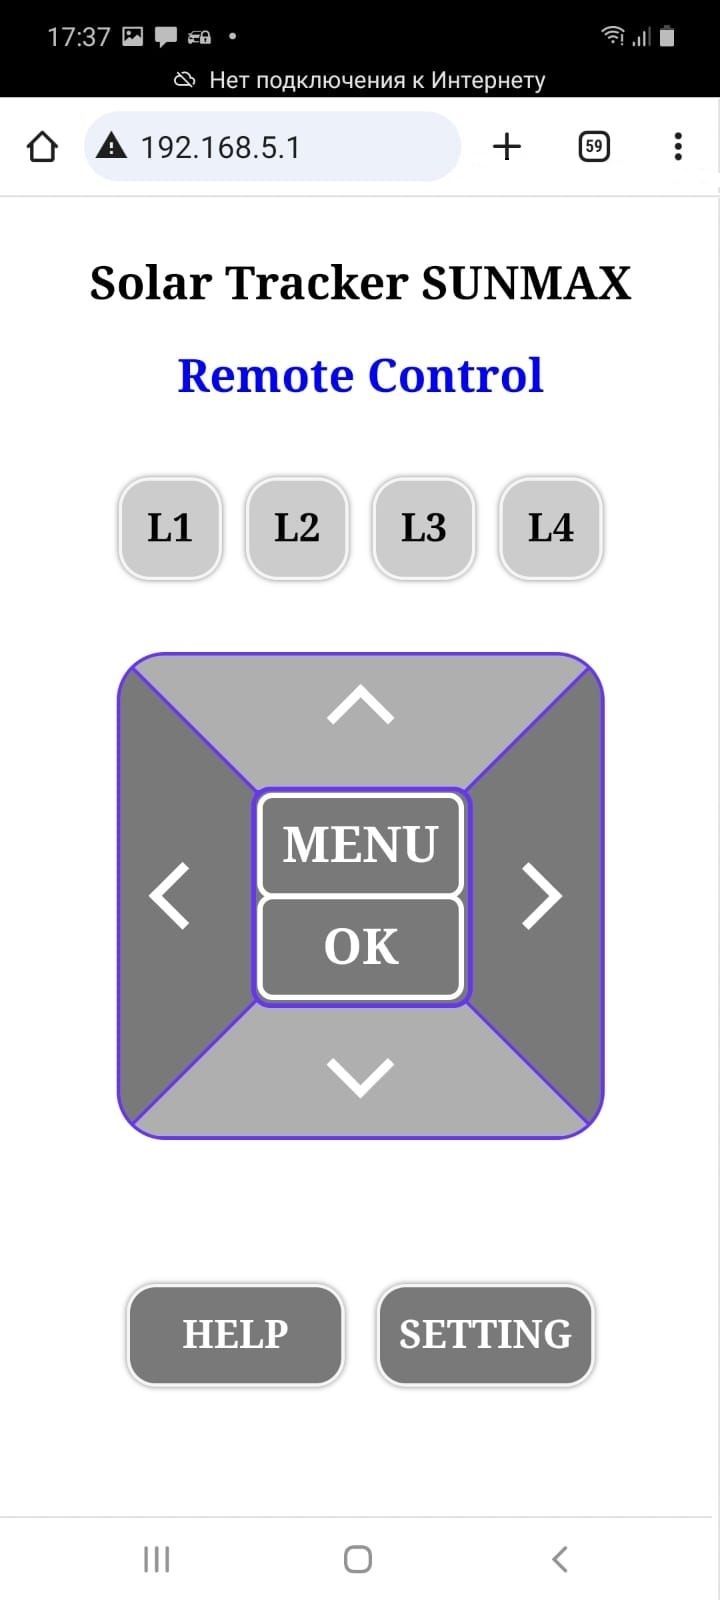
1) The WEB interface of the «Remote Control» duplicates the control buttons and LEDs located on the controller body.
2) When you press and hold the buttons («Left», «Right», «Up» or «Down») for approximately on 1.5-2 seconds, the states of these buttons are fixed. Pressing the fixed button again or pressing any other button resets the fixed button state.
3) The «Remote Control» has two operating modes. Mode of permanent or temporary use. To enable the temporary mode, you need to place a small magnet above the «LEVEL» inscription located on the removable cover of the controller housing. The magnetic field turn on the power to the «Remote Control». When you remove the magnet, the «Remote Control» will turn off. For permanent mode, a jumper is provided on the printed circuit board. To enable permanent mode, place a jumper on this connector. In this case there is no need to use a magnet.
Wi-Fi Setting
1) When resetting the settings to factory defaults, the AP mode is activated by default, the network name is «admin» without using a password.
2) To connect to the WEB interface of the «Remote Control» you need to enter the IP address in your browser: 192.168.5.1
These are temporary network settings and the user needs to change them to their own by setting the name of their Wi-Fi network and their password.
4) To change the Wi-Fi settings, go to the settings. On the settings page you can select the STA (STation) or AP (Access Point) mode that is convenient for you.
5) Enter name of the network and the password you will connect to. For example SSID: «ABCDEFGH» and PSW: «12345678» and press button «Save».
6) The IP address of the «Remote Control» in Wi-Fi network can be seen in the list of connected devices of Wi-Fi router. For convenience, you can assign a permanent IP address to this device.
7) If you enter an incorrect SSID or PSW, the network settings can be reset to factory settings.
8) To reset the network settings, you need to press and hold the FLASH button for 5 seconds until the LED on the esp8266 board turns on, and then briefly press the RST button. At the same time, the LED on the esp8266 board will go out.
9) If you need to update the device firmware, you need to connect the USB adapter to the TX, RX and MINUS connectors located on the printed circuit board. Then connect the USB connector to the computer and activate the firmware mode. Activation of the firmware mode is carried out by pressing and holding the FLASH button, then, without releasing the FLASH button, briefly press and release the RST button. Then the FLASH button is released and you can start updating the firmware.
High-precision solar tracker controllers SUNMAX
Sun for the people!
